matt harvey art
Portrait paintings, art demonstrations, figurative painting, landscapes
Short clip of my latest painting
Posted on May 12, 2024
I love drawing and painting the human figure. I see these paintings as sculptures though really, they are prequels to carvings.
I am wary of interpretation with these paintings. For me, in and of themselves they show the beautiful symmetry of the human form as it reflects the macrocosmic universe.
Portrait of a young girl after Rubens, 2nd glaze!
Posted on March 5, 2019
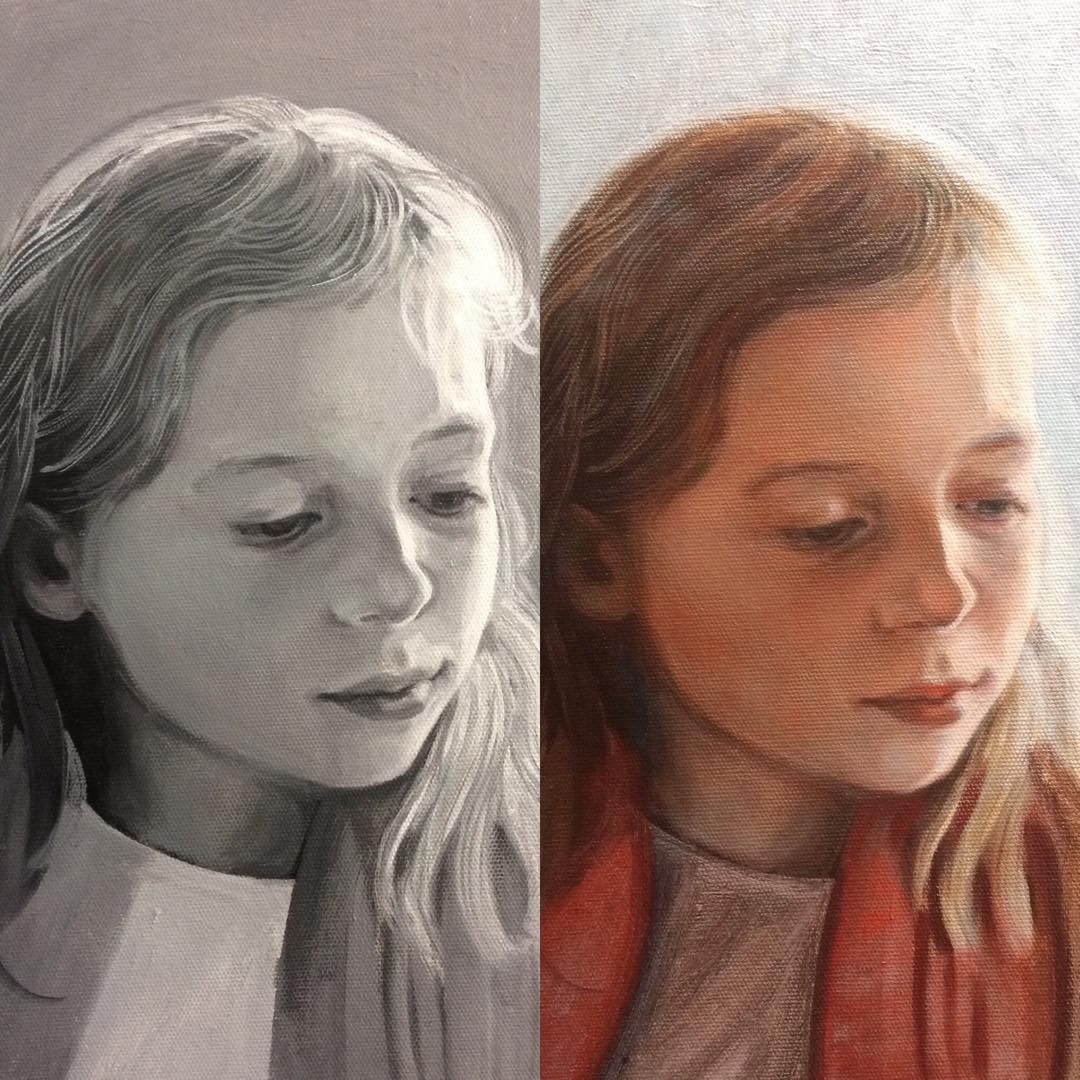
Hi there, I’ve been looking forward to doing this for a while, and now I’ve completed the films of both the glazes. Here is a photo of before and after the 2nd glaze.

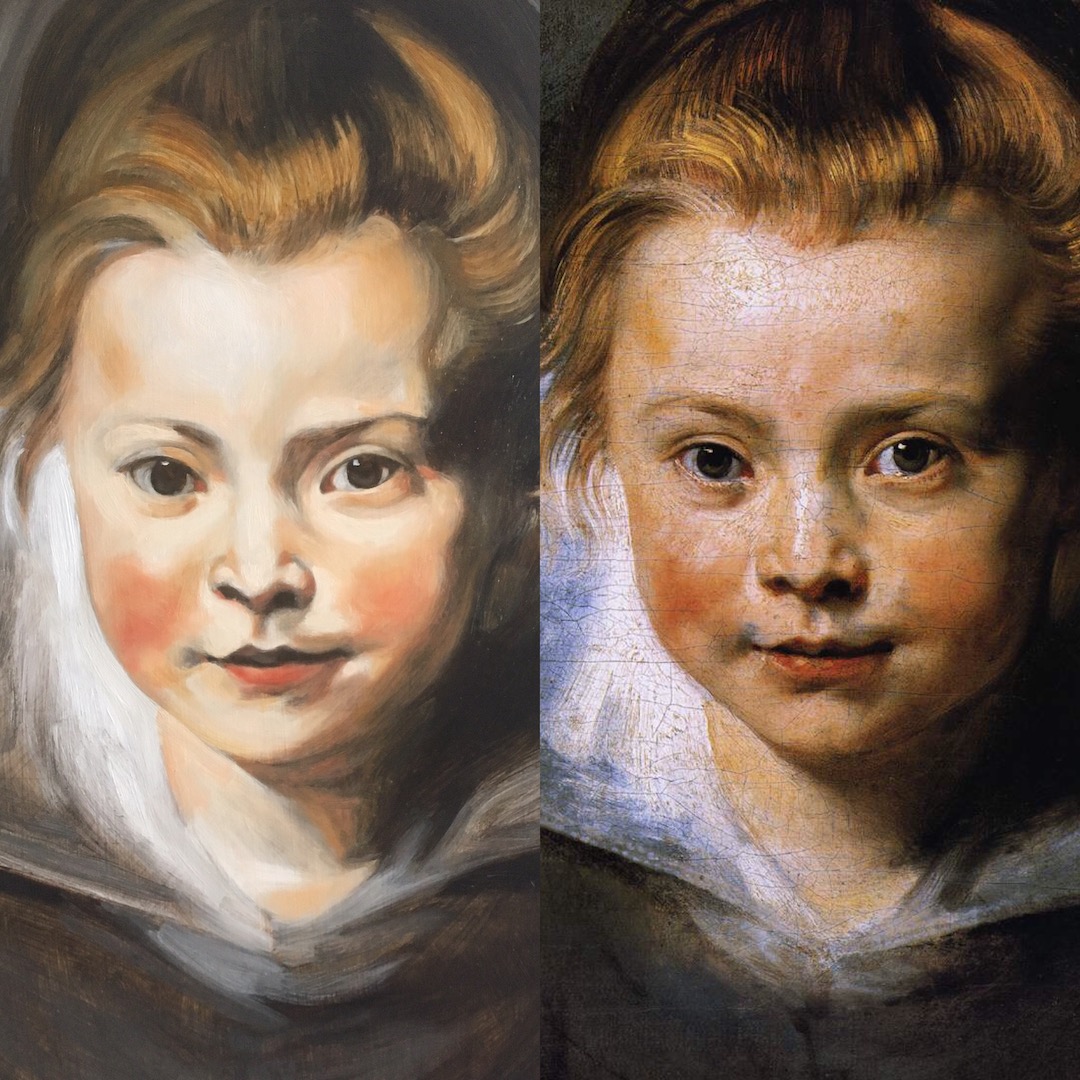
from the 1st to 2nd glaze
So this is the painting again showing the change from the 1st to the 2nd glaze, and then following on from that you can see the 2nd glaze next to the original. The 2nd glaze took about 90 minutes, and you can see it in real time on Patreon, and off camera I spent another 10 minutes painting in the dark lines around her eyelids and some details of eyelashes. I feel this is close to the working method of Rubens, and now I’ve done it I think I can get even closer and work even more efficiently. I’m really looking forward to making some more copies from Rubens, Van Dyck, Velasquez and Caravaggio. Each time is an amazing learning experience and I have gained so much from it. I will still work on this painting a bit more but have to stop for now due to time restrictions. I didn’t really do much to the mouth which is OK, but I would model some of the transitions around there next time. In terms of the film I’ll leave it for now because I think it shows you how to achieve these results. It has been a revelation for me just working in this very limited palette, and I’m looking forward to using it in my own work in the future. If you would like to see how I did it in real time you can see it all on patreon.
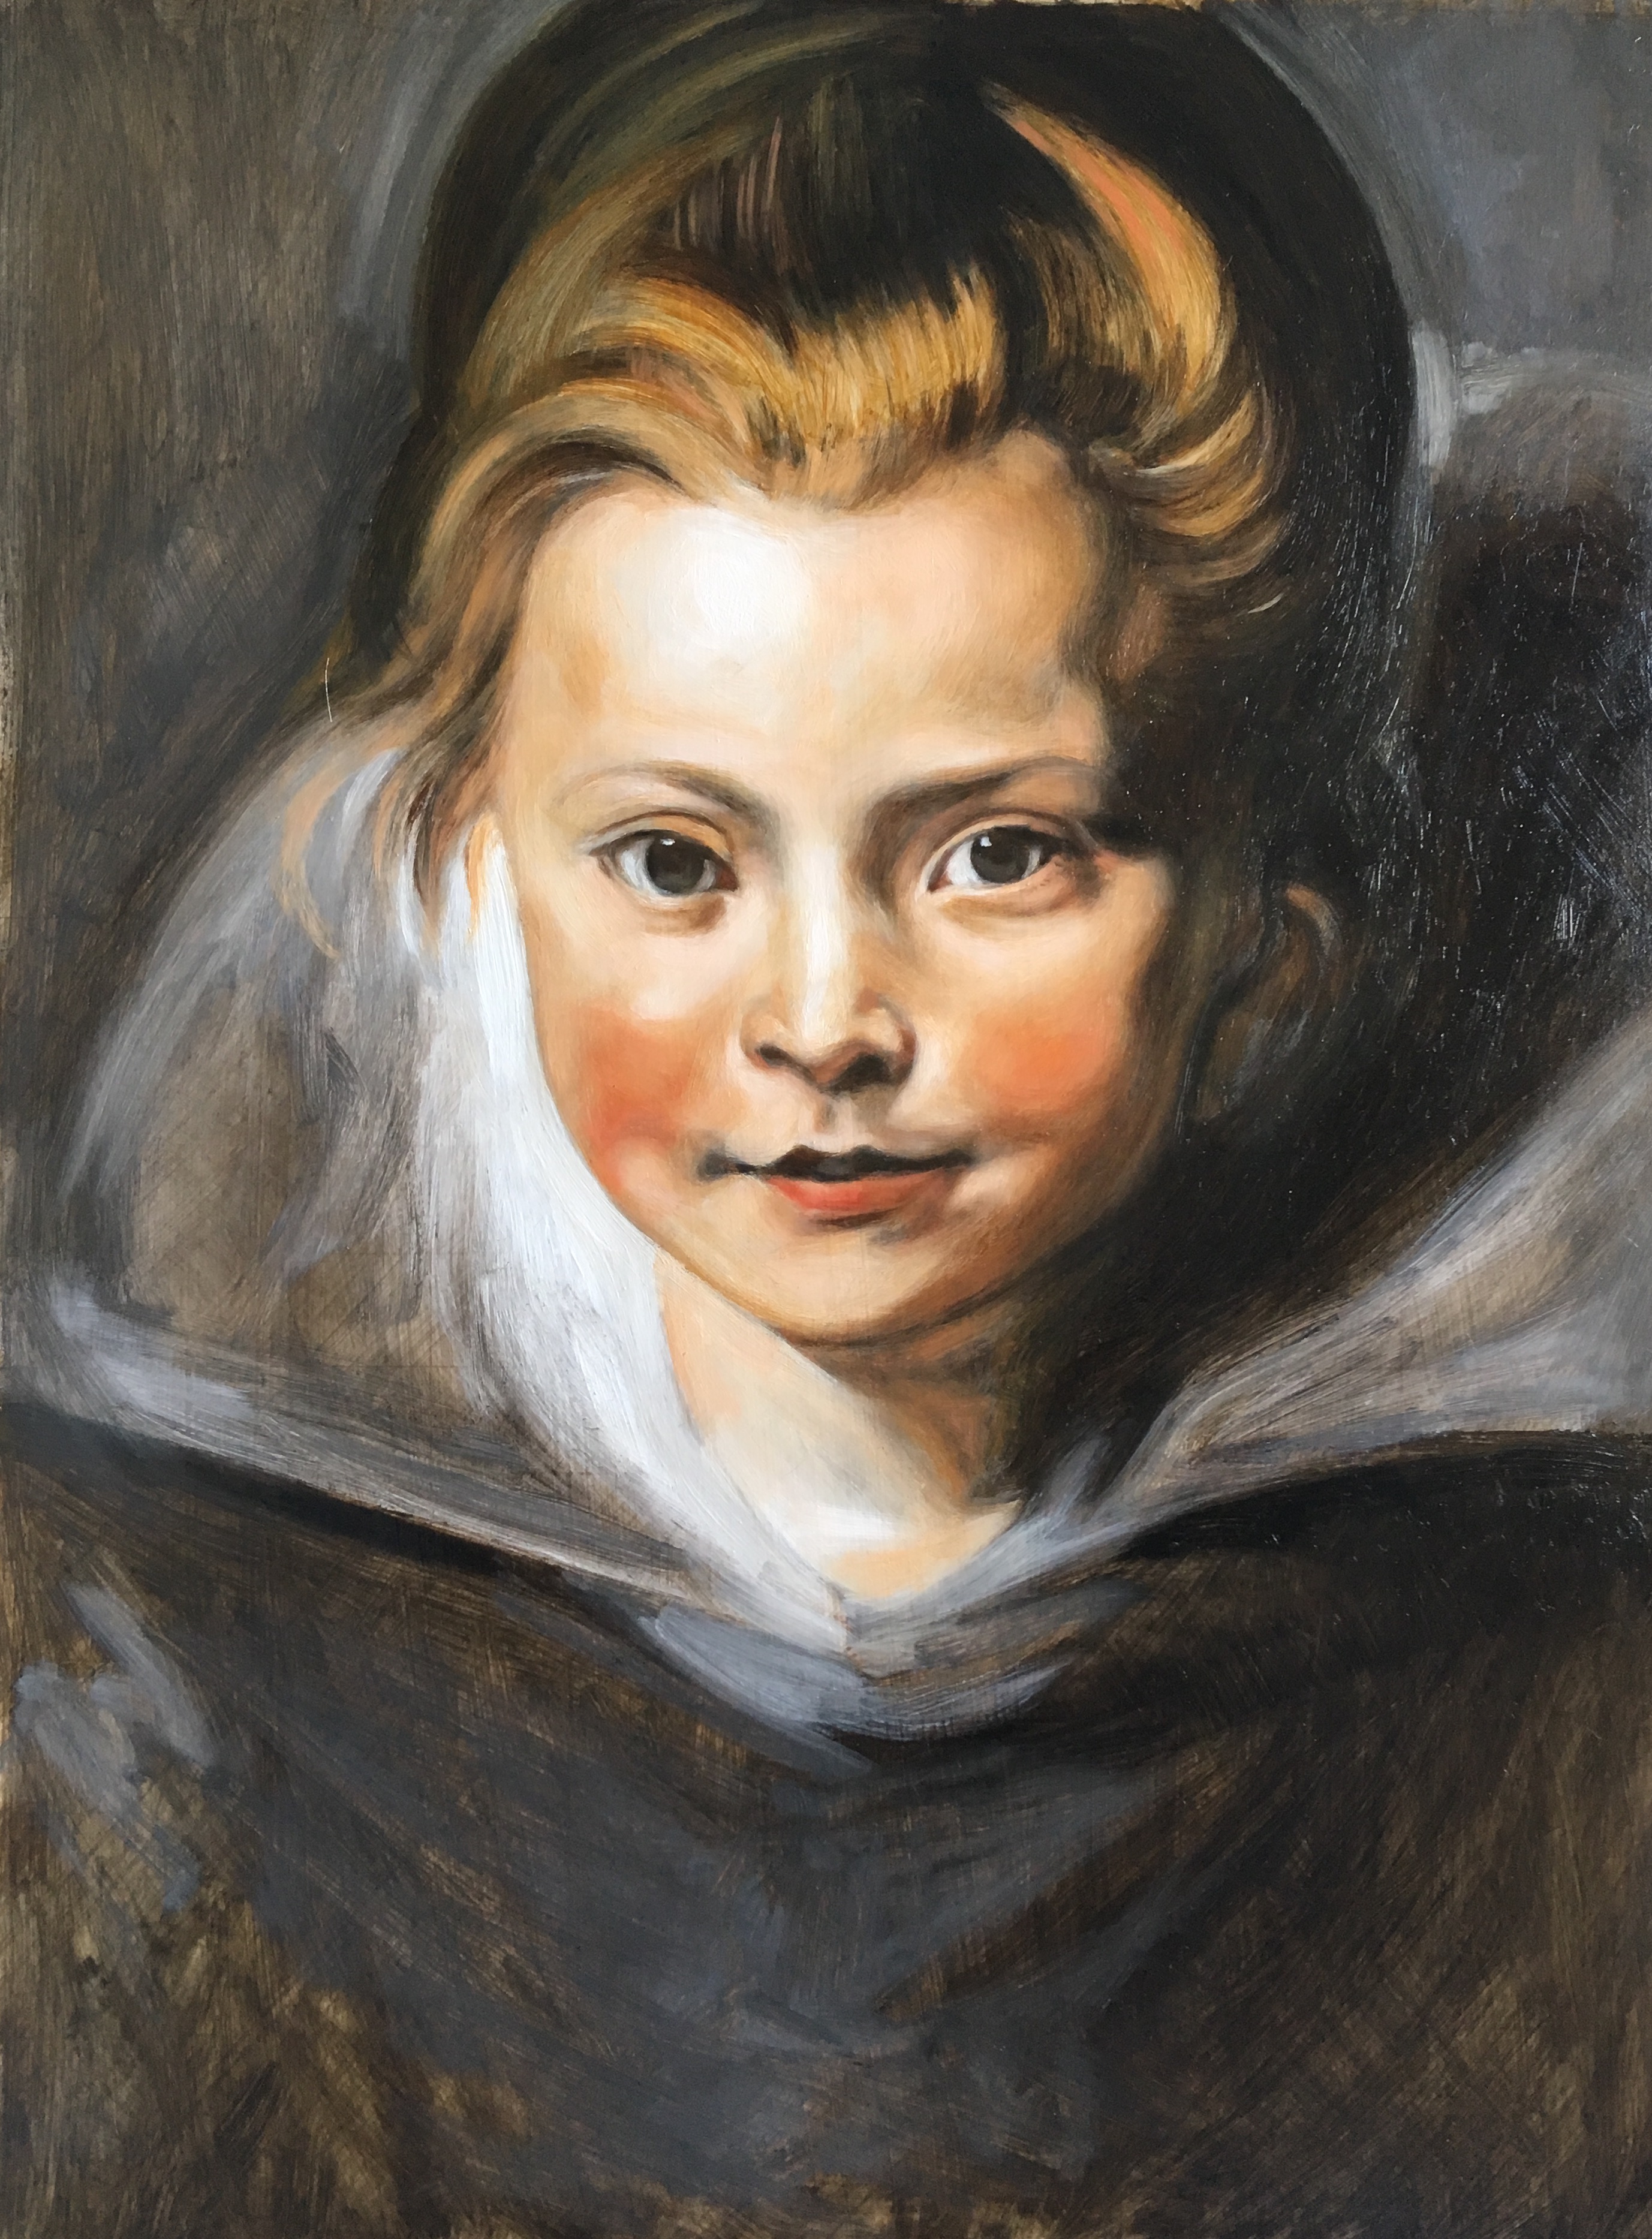
about 6 hours work to get to this point. I painted the underpainting in 2 passes in Raw Umber, then 3rd pass using more Ivory black, and then 2 separate colour glazes using Vermillion, Yellow Ochre, Black and White, and some Burnt Umber
New Caravaggio technique video – underpainting stage
Posted on February 27, 2019

Underpainting stage for Boy Bitten by a Lizard, after Caravaggio
Hi there, I’ve just posted this on youtube. Its going to be one of 2 videos there but 6 in total on patreon where they are also unedited and in real time. This video is cobbled together from 3 real time films, about 3 hours painting in all. I loved copying this painting and learned so much. Looking forward to the next one! I still have to finish the Rubens copy I’m doing as well. And the glazing for this painting. After that Velasquez and Van Dyck.. all the Baroque greats. Thank you for looking!
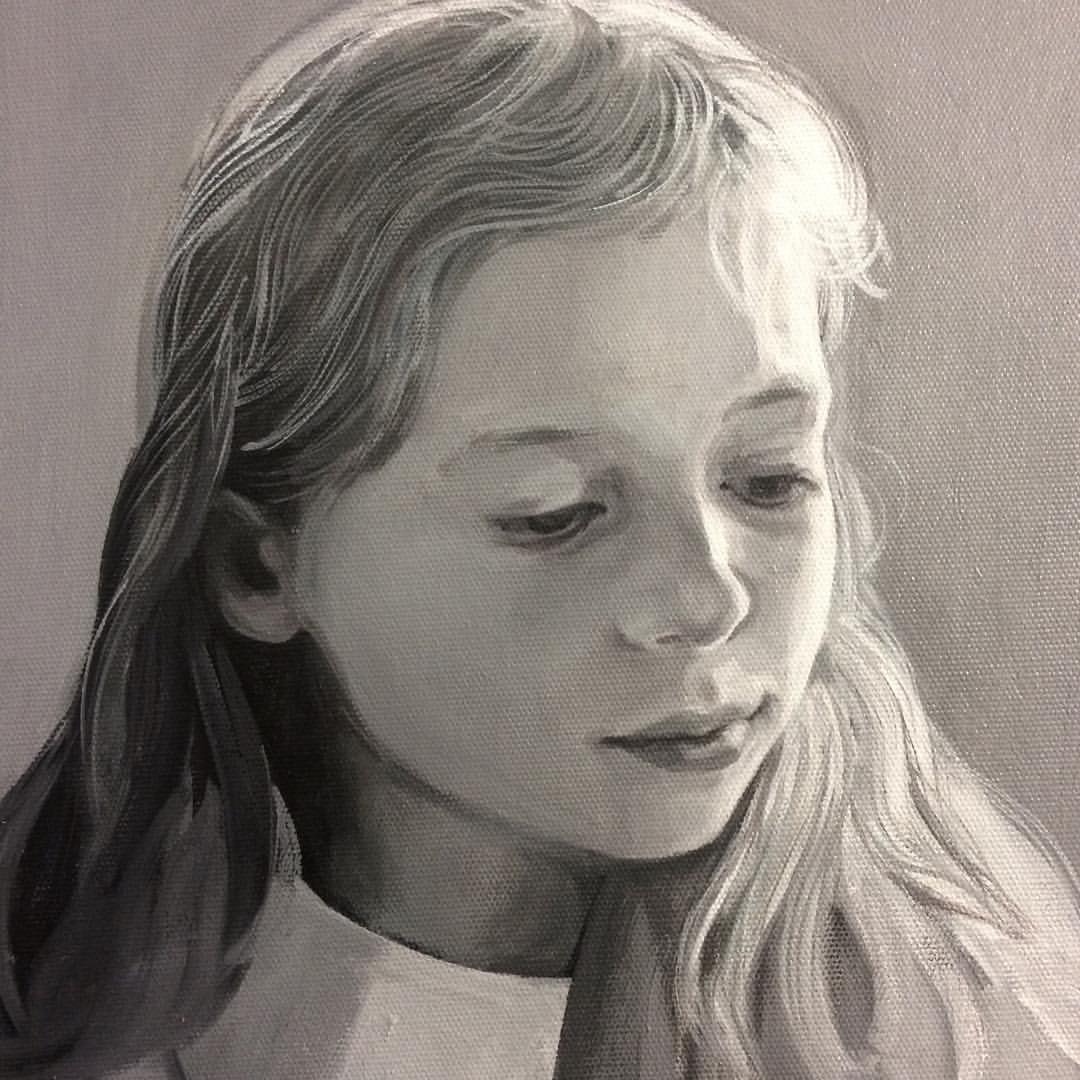
Portrait of a young girl after Rubens, 1st glaze
Posted on February 21, 2019
Portrait of a young girl after Rubens 1st glaze from patreon.com/mattharveyart
Here is an image of the 1st glaze as I finished filming. The real time video will be on Patreon but there is a taster on youtube. One amazing thing I discovered doing this glaze was that I only used 3 colours; Titanium White, Vermilion and Yellow Ochre. I feel now that I may have been a bit stubborn in my pursuit of authenticity in the process here. Looking at the original I am sure that these are the only colours Rubens used, although the fact remains that there are deeper shadows in the original. Usually I would have painted the shadows in first and worked the highlights into them, and I am sure I would have got closer to it if I had. I have read that Rubens used Burnt Umber and Alizarin Crimson as well as Ultramarine Blue, and all these would have helped create shadows in the first glaze. I will correct it in the 2nd glaze but honestly I would have liked to get closer to the original painting. Comparing them here I can see that Rubens’ colours were a lot darker, or richer. I don’t know for sure if he used further glazes, and my initial guess is he finished it in the 1st. Having said that though, when you look at it the paint looks as if it has been built up in layers, but its hard to tell. I might try and do it again from a print of my underpainting.
I say I think he finished it in one go after underpainting because his paintings generally have that effortless spontaneity in the brushwork and the handling of paint. He worked quickly, and relished the magical effects of glazing over grisaille underpainting and the efficiency of this process. His large studio and many commissions encouraged this way of working – prizing brevity and clarity and the swashbuckling technique that is so characteristic of Baroque painting.
The shadows are simply the underpainting showing through and possibly the underpainting was in quite high contrast, or certainly more than you would usually expect. Look at the cool areas around her mouth. These are created only by the raw umber underpainting showing through the glaze above. But then maybe the shadow under her right eye is made with a cheeky bit of Burnt Umber and Vermilion? Its fun to try and find out. Fun and agonising at the same time. When teams lose a rugby match the captain always says something like ‘It’s really hurting! The lads just wish they could go out there and play them again now!’ Painting always feels like that. Especially when you’re waiting for the thing to dry so you can just get out there again and make it right.
Learning the glazing technique from Bouguereau, new series of videos
Posted on June 12, 2018
I’m embarking on another short series of videos on my youtube channel showing the process of copying this part of a Bouguereau painting from start to finish. I hope to use this as a way to learn about his process and to improve my own glazing technique. Bouguereau primarily used grisaille and glazing as a method of painting and his glazing has a beautiful translucent quality. This first video focusses on how I prepare a canvas or board and using a grid to transfer a photo or drawing to the surface.
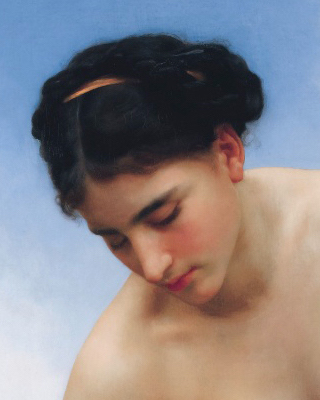
Après le bain, oil on canvas 178 x 88.5 cm W-BOUGUEREAU – 1875
Here is a link to the first video in the series:
Portrait painting in oil – underpainting in grisaille
Posted on May 8, 2018


I have been reworking a long standing grisaille portrait painting in oil and experimenting with a more colourful painterly approach. I am still using the glazing technique, but with a more complex palette than some of my other work. The original photo reference was taken in an interior space under a combination of artificial light and daylight. This gave the skin in the reference a rich multi-hued surface, where the face was illuminated artificially and was only slightly in any shadow. Looking at it one can see oranges, greens, blues, yellows, every colour imaginable but with only the slightest variation in value, or light and dark. It has some beautiful cool shadows juxtaposed against warm (very warm) highlights.
I was pleased with the grisaille underpainting, and it worked because I am now more attuned to the very subtle changes in value when painting portraits. In the past I may have mistakenly exaggerated the changes in value, or light to dark, but I have come to see that these changes are only very minor and actually best left to the overpainting and colour glazes. It appears best to take a ‘paint by numbers’ approach and work in larger areas of grey values, what they call ‘blocking in’, and to use colour to build the shape of the face. Unless a sitter is very brightly illuminated with a strong chiaroscuro effect, then even the differences between shadow and highlights in a portrait can be quite subtle. Working in colour as opposed to modelling light to dark is something Cezanne called ‘modulation’ – where colour alone creates the sense of the form. He said ‘When colour is richest, form is most complete’.
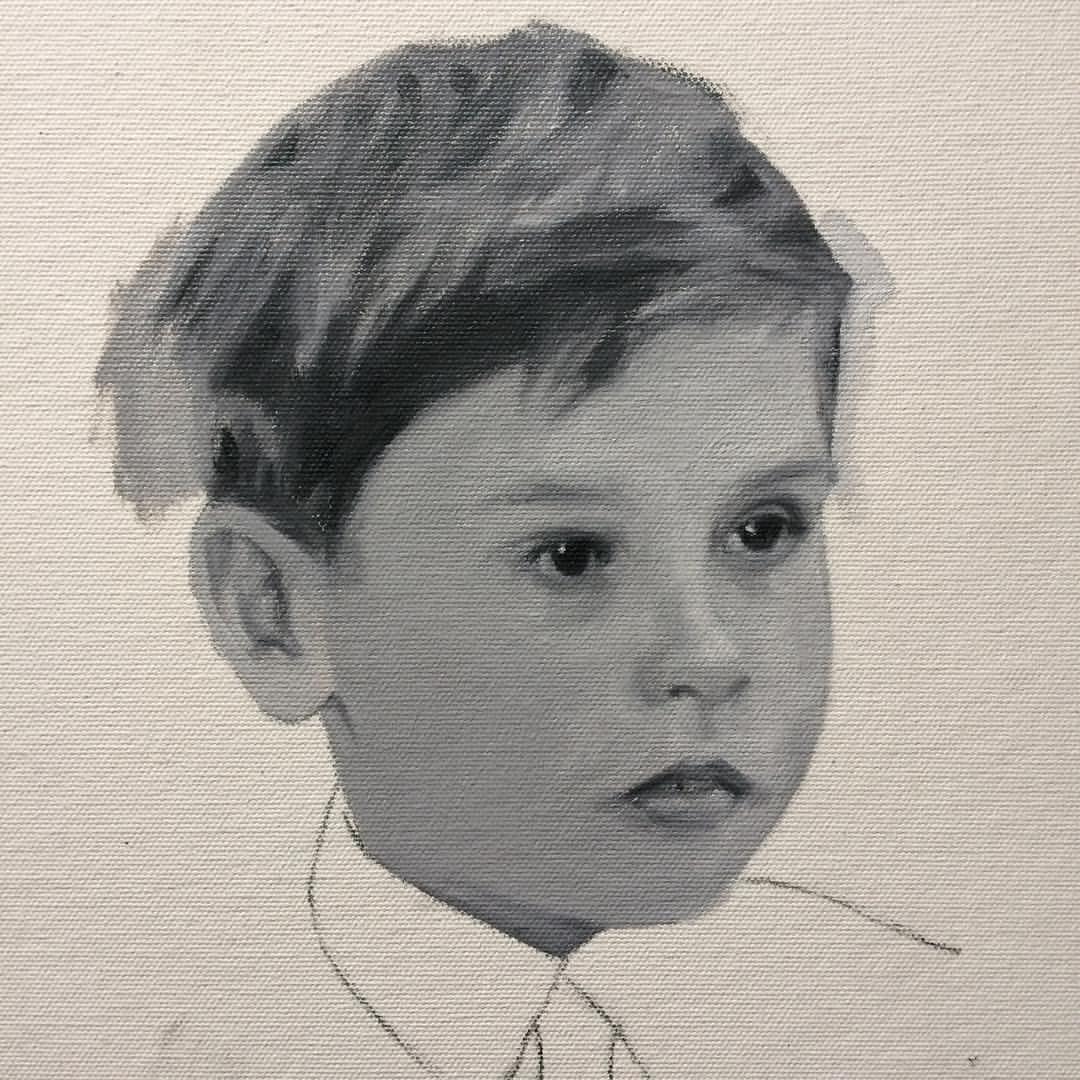
I have painted a few grisaille portraits where the grisaille is too dark, and this was the problem here. Unfortunately I can’t show a photo of the first glaze which didn’t work, but the colour glazes I used over the initial grisaille made it all too dark. This has happened in some other portraits I have painted. Oil colours themselves can have different values depending on how much paint you put on, so when I tried to colour his cheek using a little alizarin crimson with sap green this was too much and ended looking unsightly. When I squint my eyes at the reference it looks the same as the grisaille in terms of the values, so in order to make room for the colours on top I needed to lighten it first. I don’t actually like painting too methodically in this way, as it seems to suck all the joy and spontaneity out of it so I need to develop it so it still feels natural. By natural I mean the relationship between me and subject is one of looking and responding in the most unaffected way, without calculation. Here is a portrait from 15 years ago, painted before I got stuck into the grisaille technique and trying to find the best formula to paint with. I still love the freshness and simplicity in the drawing and colour rendering. My goal would be to combine this with a more rigorous technique if that is at all possible.
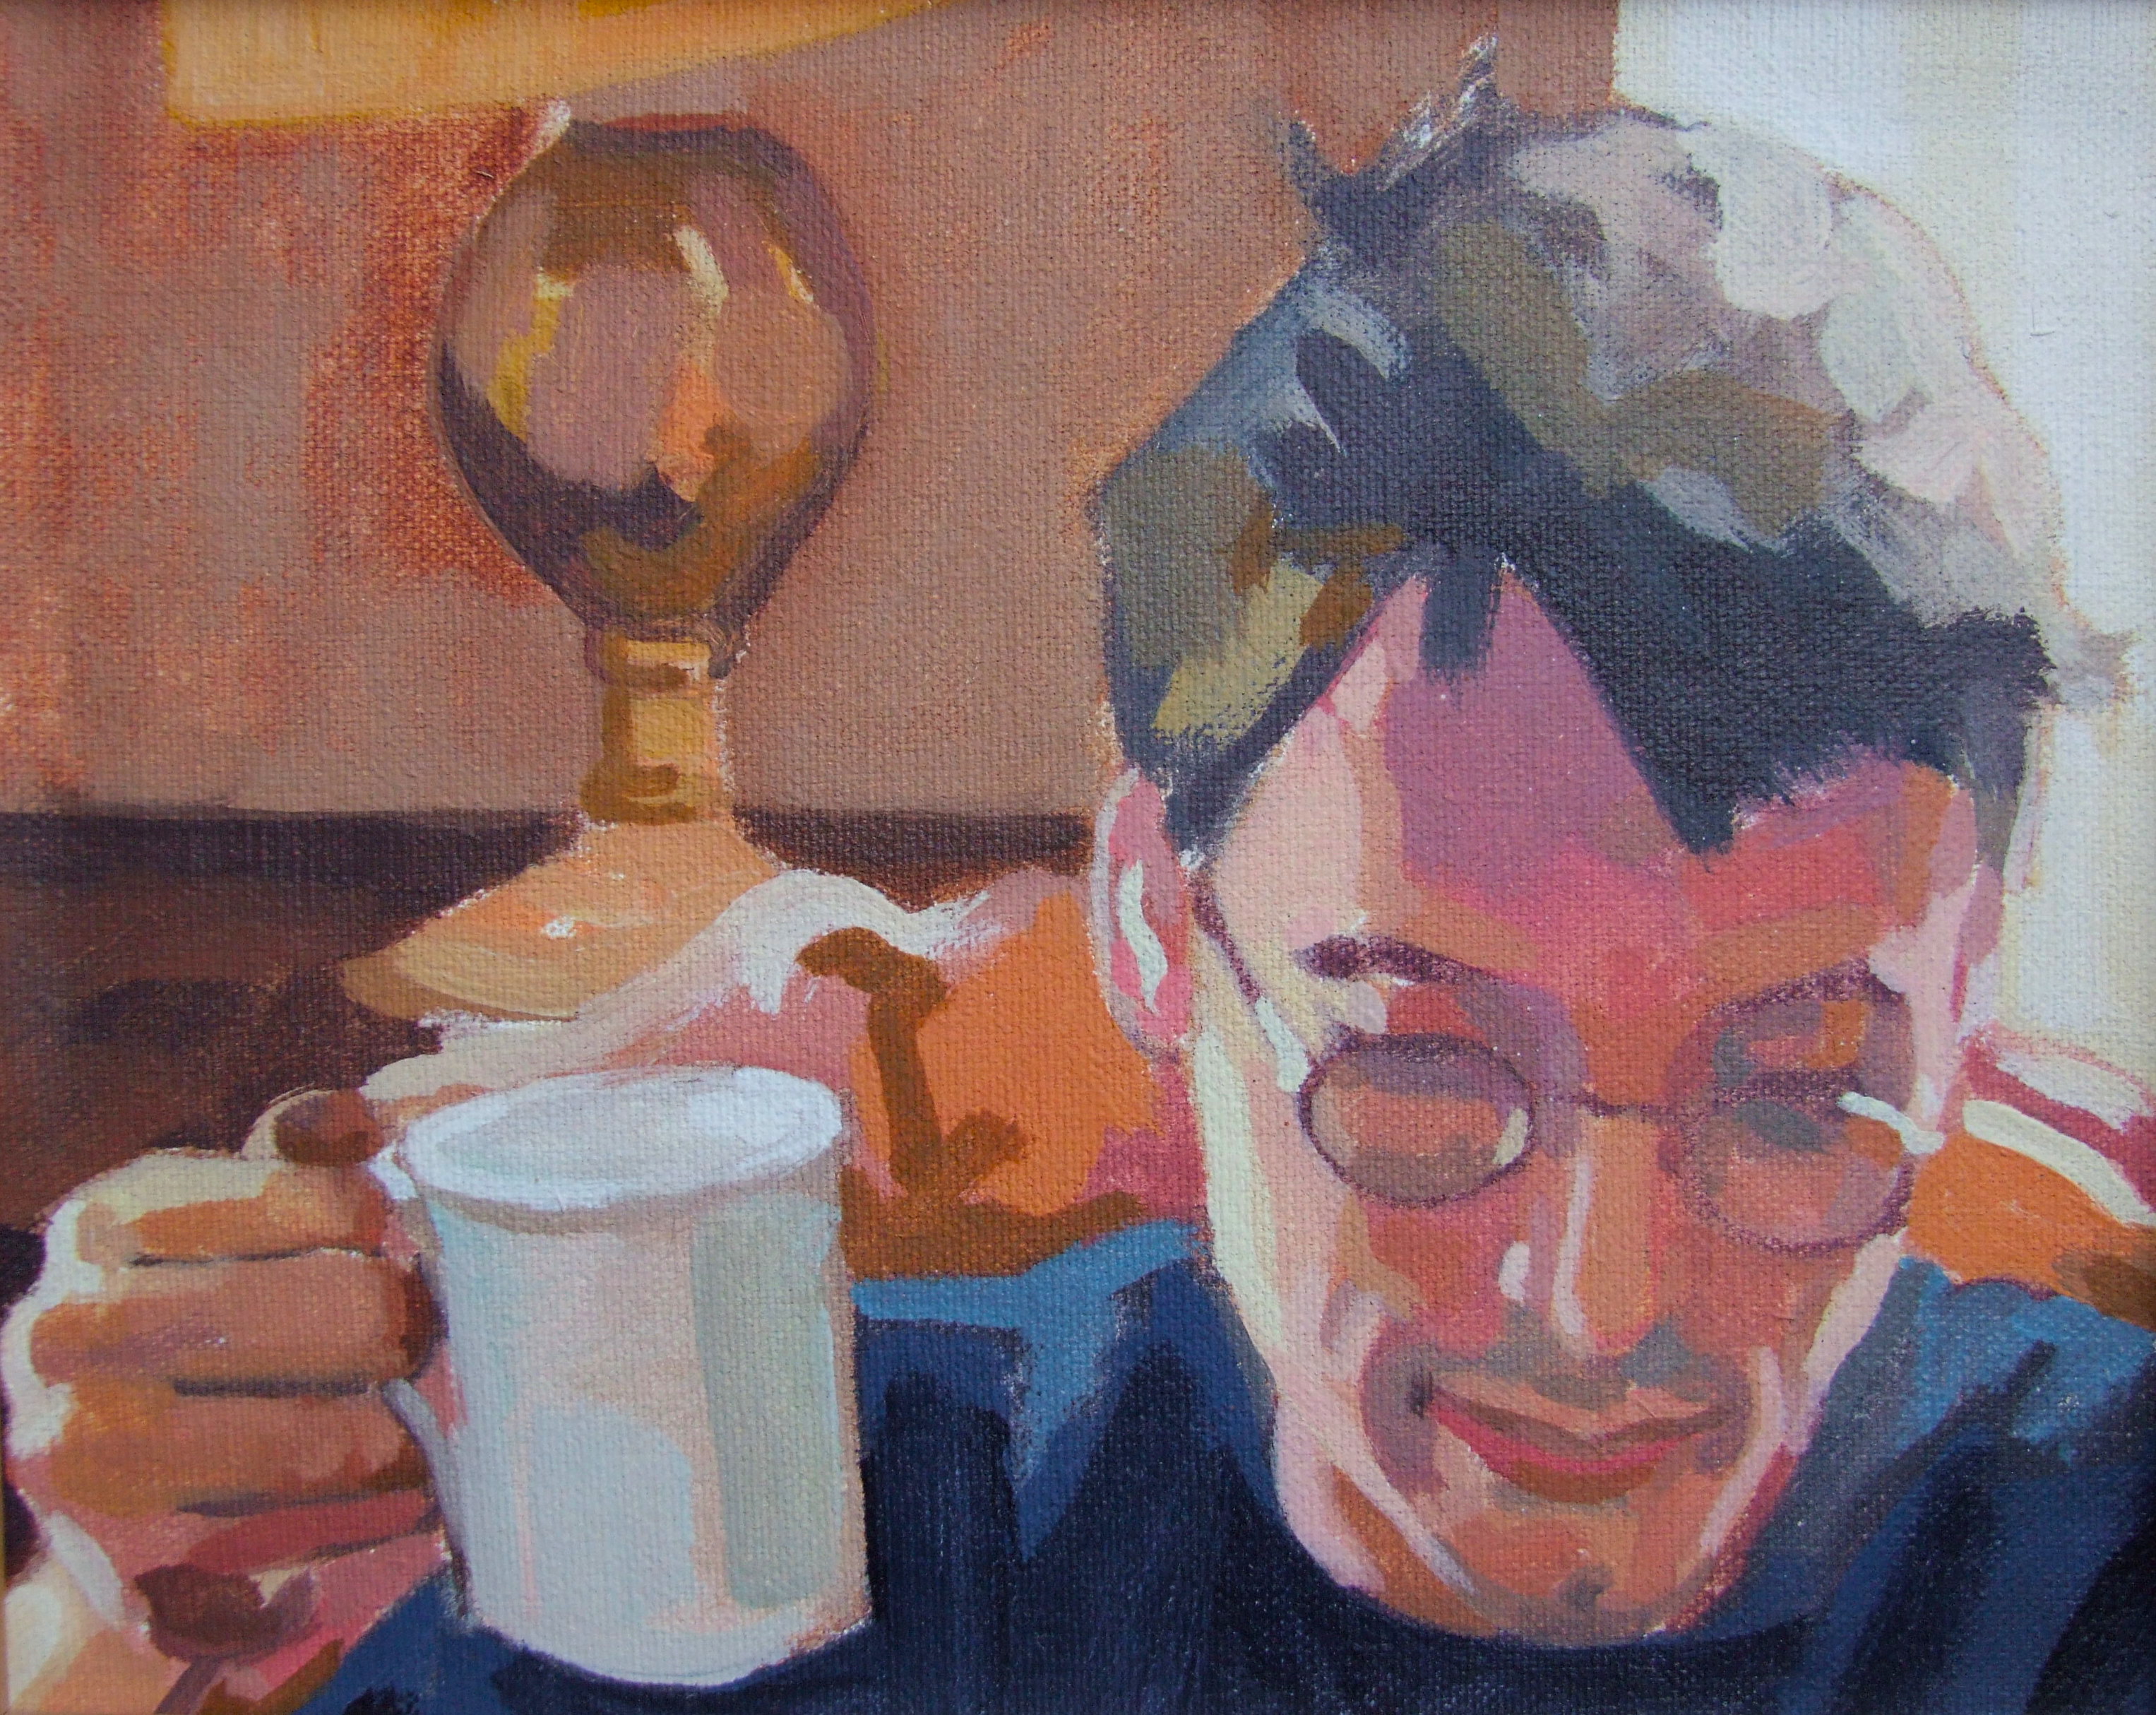
Portrait of Tom – painted in a sitting without any knowledge baggage! I hope to return to this way of working, without losing everything I now know about colour, value etc.
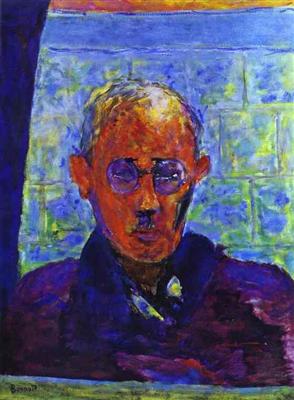
When I attempted to glaze it I found I couldn’t do it, the hues were just too subtle. This was in the early stages of my learning the glazing technique and was beyond me at the time. So the glazed version was shelved for a good while. I have a bad habit of giving up on paintings when actually nearly all paintings are redeemable. As Camille Pissarro said though, you have to keep working until you get it right. When this happens paintings just end up marked ‘fail’ on the fail shelf, and they gnaw away at me. This is a weakness I am trying to overcome, and in that spirit I went back to this portrait and reworked it, specifically after looking at Bonnard. He is such a gorgeous painter who has a rare magical ability with colour, always surprising and new.
Looking at Bonnard fuelled the desire to just let go a bit and love colour, love painting again. Sometimes working on the grisaille technique has made me work in a narrow way and I felt I lost my earlier naive jollity. That’s not what I was taught though by Louis Smith amongst others, who all used many different colour hues when glazing. I just got to a point where I found a way that was working and stuck with it. Having said all that, I was happy with the grisaille paintings that I glazed, I just felt I wanted to let go a bit. It wasn’t working in this particular painting anyway, so I needed something different. I can’t just ape Bonnard in his beautiful loose technique, which you can see was always his sensibility when you look at his early work. I love colour but also love ‘polishing’ the drawing, which is something I get from my love of stone carving.
Here is a Bonnard self portrait to give an idea of what I mean.
New video on youtube of the grisaille and glazing process
Posted on October 26, 2017
I wanted to share the magical transformation an oil painting undergoes, glazing oil colour over a monotone underpainting.
I filmed myself painting the glaze and velatura over this portrait for one hour, in 3 short videos – this being the first. Its the first glaze and there will be a few others to finish the portrait, but this video shows the process, and I hope shows why I find it such a rewarding method to work with. It shows the dramatic results you can achieve in a relatively short amount of time.
Underpainting using Titanium White and Ivory Black oil paint on canvas
Posted on August 1, 2017
Tommy, grisaille portrait painting, oil on canvas. Painted with Titanium White and Ivory Black. This is a typical grisaille underpainting before the colour glazes of oil paint
Tommy- underpainting in progress. Underpainting is a technique used since the renaissance. It usually refers to a monochrome foundation or base layer, and layers of paint are applied on top. This one is a grisaille or grey, but there are various different kinds, and not always of the monochromatic variety. Titian used coloured underpainting. The idea is that it supports further layers of paint, as a foundation supports a house. For me it is purely a pragmatic solution where I can be confident that the drawing is correct and can continue applying further colour layers without having to backtrack and amend the drawing as I go. If I’m painting a portrait to commission I like to work as efficiently as possible, and in the past I have found myself in tricky situations where I have had to keep going over the drawing because its not right, and this can be very time consuming. As I have said elsewhere, you can throw a lot of good painting after bad if the drawing isn’t right first.
The other type of underpainting I have used is called ‘verdaccio’, which is a green version, and usually made by mixing black, yellow and white although I think a nice version would be with Michael Harding’s Sap Green and Titanium White only. I never used black as my art teacher at school was a hardcore impressionist with a love of purple who could not abide it. Honestly it took me 20 or more years to get over that – just couldn’t use the stuff.
Anyway there were a lot of impressionists or those painting at the same time who loved a good bit of black, think Manet and Degas. But we were taught to mix optical blacks with reds and greens or browns an blues and these are very beautiful, and deeper than your average black in a tube. When I learned how to mix oil paint for skin tones from Louis Smith using reds and greens, that struck a chord with my earlier learning and its stayed with me as the basis of all the glazes I’ve found the most useful when painting portraits.
In every portrait painting I paint using the grisaille method, I use the same mix of Alizarin Crimson, Cadmium Red and Sap Green to start off (has to be a warm Sap Green – Michael Harding does a beautiful but cooler version which is different to the one I need). I have a Winton Sap Green that is good for now. Maybe a little Raw Umber as well.. All the other glazes I mix hover around this mix on the palette, depending on the person I am painting of course.
First glazing over grisaille portrait
Posted on March 6, 2017
I’ve put the first colour glaze put on this portrait in 2 stressful hours! A few more glazes needed and I’ll add them over the coming days. I use M. Graham’s Walnut Alkyd medium which dries overnight – or to be extra sure within 48 hours. I enjoyed painting his ear and chuffed with the result! It felt good to achieve some economy of handling with the paint, and not get bogged down in it. #ear #chuffed #figurativeart #contemporaryart #portraitpainting #portrait #grisaille #underpainting #oilpainting #oiloncanvas #realism #art #painting #glaze #devonartistnetwork #devonopenstudios #devon
First glaze
Posted on November 24, 2016
First glaze done. Took about 90 minutes. I’ll adjust the colours and drawing as I go on #portrait #art #painting #oilpainting #glaze #grisaille #underpainting #contemporaryart #realism
Grisaille underpainting
Posted on November 15, 2016
Grisaille underpainting finished for another portrait. Ready for a glaze very soon. #devon #portraitpainting #glazing #underpainting #contemporaryart #art #portrait #oilpainting #oiloncanvas #painting
Posted on November 14, 2016
//www.instagram.com/p/BMzGPrlD5C6/embed/
Glazing over the grisaille. I’m sure you’ll appreciate the flashy production values. Full video at mattharveyart.com #grisaille #portrait #art #oilpainting #contemporaryart #underpainting #glazing #portraitpainting #devon
Colour glazing – 3rd glaze over the underpainting
Posted on November 10, 2016
The third glaze has been painted with veils of oil paint over the grey or grisaille underpainting. I did some experimenting with the background here, but ended up painting it out in further glazes.
3rd glaze done. Still a few more needed #underpainting #grisaille #portrait #portraitpainting #oiloncanvas #art #painting #fineart #devon #glaze #contemporaryart #contemporaryrealism #oilpainting
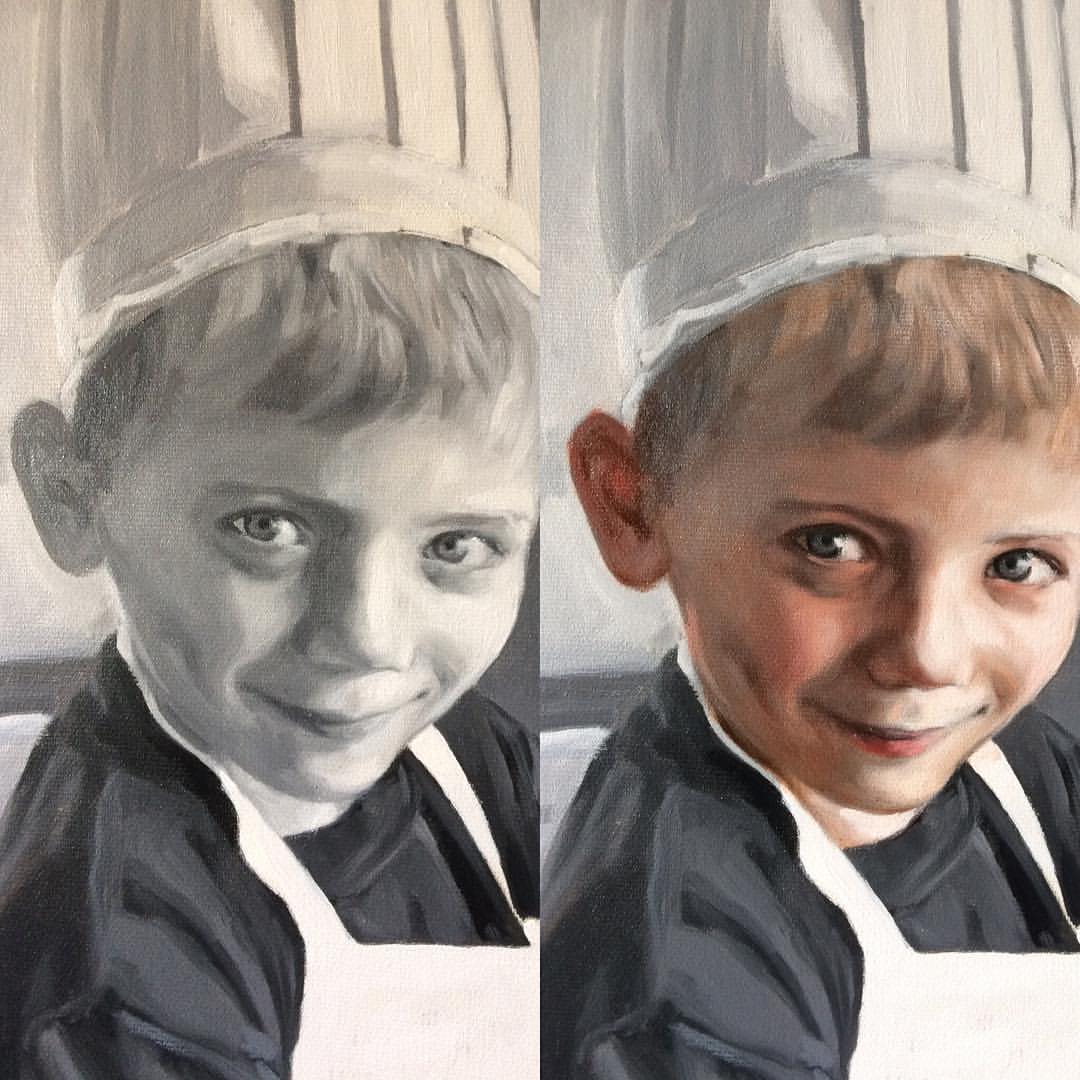
Before and after glazing with grisaille underpainting, Portrait of Hideo in oil paint on canvas
Posted on November 8, 2016
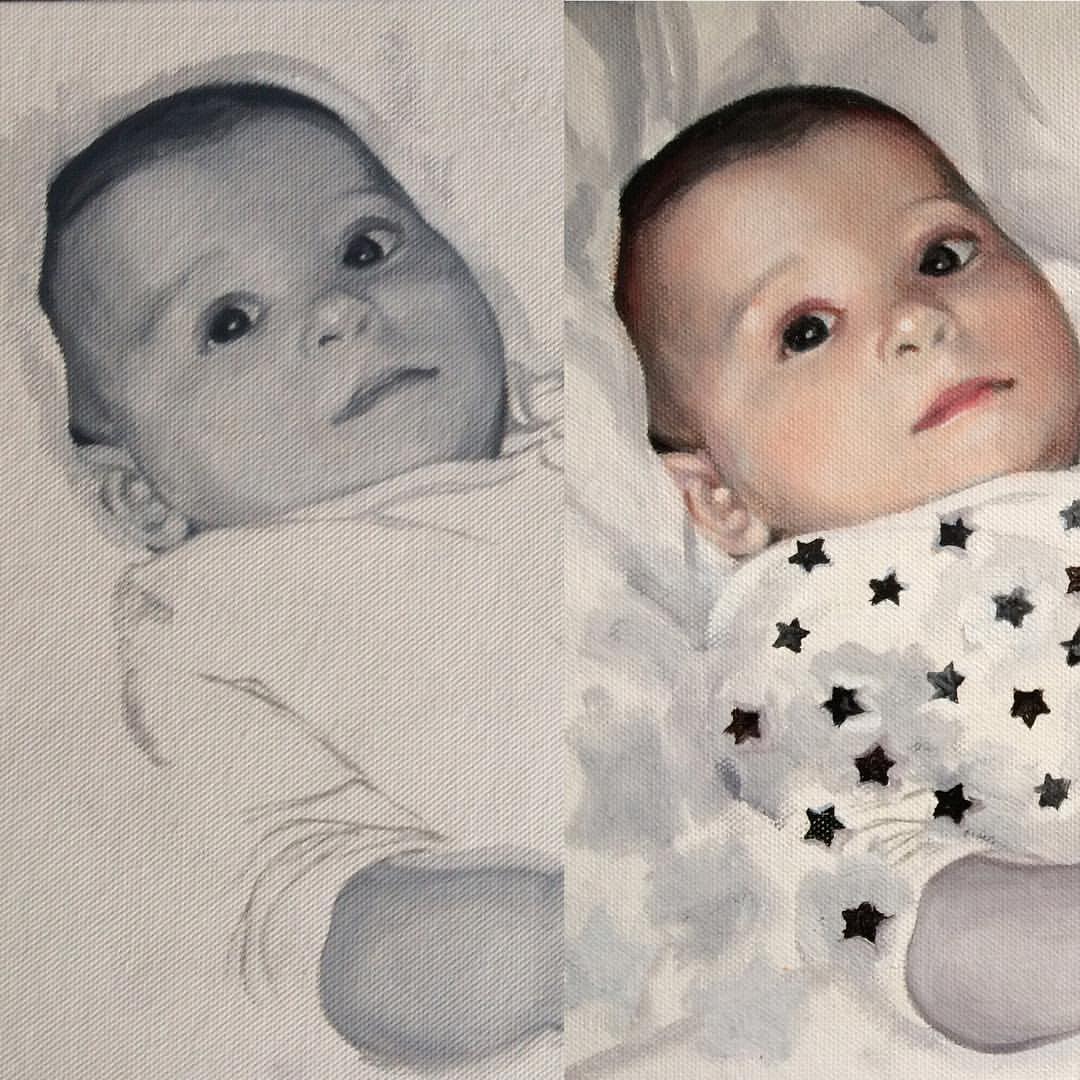
This clearly shows the before and after versions of this portrait. Painted in oils the first glaze transforms the grisaille underpainting
Before and after #rosycheeks #babyboy #stars #oilpainting #portraitart #portraitpainting #grisaille #underpainting #glazing
Posted on November 8, 2016
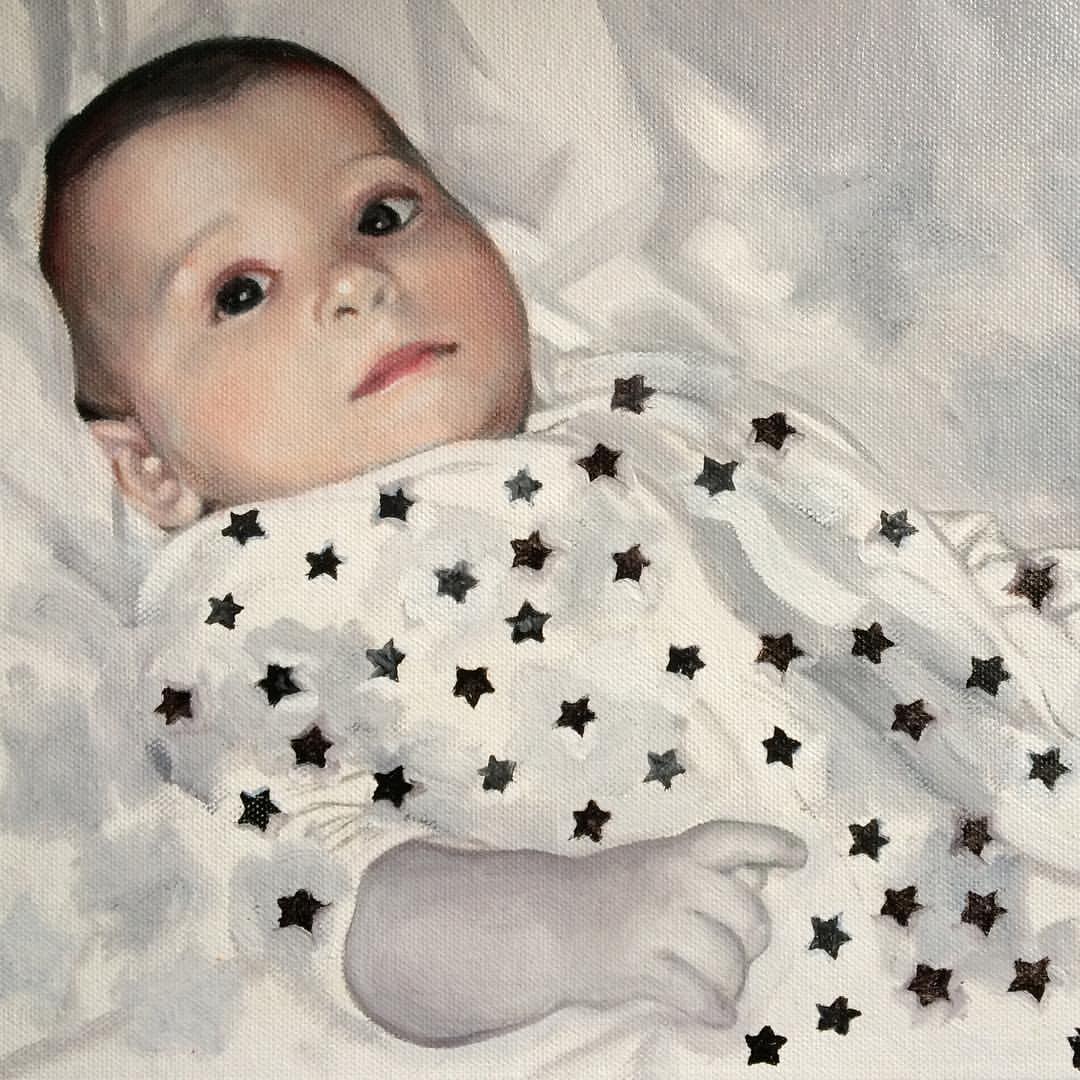
First glaze done on the face. Having fun with the pattern on his sleep suit, stars floating off the picture plane! #oilpainting #portrait #portraitpainting #underpainting #grisaille #sleepsuit #pyjamas #stars #babyboy #rosycheeks
